Introduction
While many users need the functionality of a database management system like MySQL, they may not feel comfortable interacting with the system solely from the MySQL prompt.
phpMyAdmin was created so that users can interact with MySQL through a web interface. In this guide, we’ll discuss how to install and secure phpMyAdmin so that you can safely use it to manage your databases on an Ubuntu 22.04 system.
Prerequisites
In order to complete this guide, you will need:
- An Ubuntu 22.04 server. This server should have a non-root user with administrative privileges and a firewall configured with
ufw. To set this up, follow our initial server setup guide for Ubuntu 22.04. - A LAMP (Linux, Apache, MySQL, and PHP) stack installed on your Ubuntu 22.04 server. If this is not completed yet, you can follow this guide on installing a LAMP stack on Ubuntu 22.04.
Additionally, there are important security considerations when using software like phpMyAdmin, since it:
- Communicates directly with your MySQL installation
- Handles authentication using MySQL credentials
- Executes and returns results for arbitrary SQL queries
For these reasons, and because it is a widely-deployed PHP application which is frequently targeted for attack, you should never run phpMyAdmin on remote systems over a plain HTTP connection.
If you do not have an existing domain configured with an SSL/TLS certificate, you can follow this guide on securing Apache with Let’s Encrypt on Ubuntu 22.04. This will require you to register a domain name, create DNS records for your server, and set up an Apache Virtual Host.
Step 1 — Installing phpMyAdmin
You can use APT to install phpMyAdmin from the default Ubuntu repositories.
As your non-root sudo user, update your server’s package index if you haven’t done so recently:
Following that you can install the phpmyadmin package. Along with this package, the official documentation also recommends that you install a few PHP extensions onto your server to enable certain functionalities and improve performance.
If you followed the prerequisite LAMP stack tutorial, several of these modules will have been installed along with the php package. However, it’s recommended that you also install these packages:
php-mbstring: A module for managing non-ASCII strings and convert strings to different encodingsphp-zip: This extension supports uploading.zipfiles to phpMyAdminphp-gd: Enables support for the GD Graphics Libraryphp-json: Provides PHP with support for JSON serializationphp-curl: Allows PHP to interact with different kinds of servers using different protocols
Run the following command to install these packages onto your system. Please note, though, that the installation process requires you to make some choices to configure phpMyAdmin correctly. We’ll walk through these options shortly:
Here are the options you should choose when prompted in order to configure your installation correctly:
- For the server selection, choose
apache2
Warning: When the prompt appears, “apache2” is highlighted, but not selected. If you do not hit SPACE to select Apache, the installer will not move the necessary files during installation. Hit SPACE, TAB, and then ENTER to select Apache.
- Select
Yeswhen asked whether to usedbconfig-commonto set up the database - You will then be asked to choose and confirm a MySQL application password for phpMyAdmin
Note: Assuming you installed MySQL by following Step 2 of the prerequisite LAMP stack tutorial, you may have decided to enable the Validate Password plugin. As of this writing, enabling this component will trigger an error when you attempt to set a password for the phpmyadmin user:
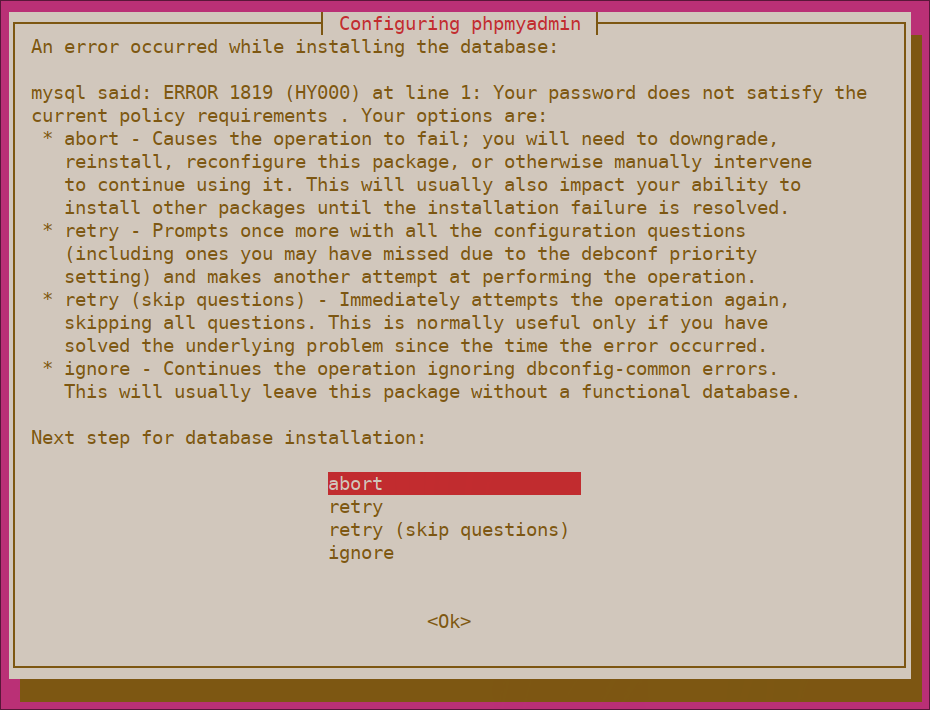
To resolve this, select the abort option to stop the installation process. Then, open up your MySQL prompt:
Or, if you enabled password authentication for the root MySQL user, run this command and then enter your password when prompted:
From the prompt, run the following command to disable the Validate Password component. Note that this won’t actually uninstall it, but just stop the component from being loaded on your MySQL server:
Following that, you can close the MySQL client:
Then try installing the phpmyadmin package again and it will work as expected:
Once phpMyAdmin is installed, you can open the MySQL prompt once again with sudo mysql or mysql -u root -p and then run the following command to re-enable the Validate Password component:
The installation process adds the phpMyAdmin Apache configuration file into the /etc/apache2/conf-enabled/ directory, where it is read automatically. To finish configuring Apache and PHP to work with phpMyAdmin, the only remaining task in this section of the tutorial is to is explicitly enable the mbstring PHP extension, which you can do by typing:
Afterwards, restart Apache for your changes to be recognized:
phpMyAdmin is now installed and configured to work with Apache. However, before you can log in and begin interacting with your MySQL databases, you will need to ensure that your MySQL users have the privileges required for interacting with the program.
Step 2 — Adjusting User Authentication and Privileges
When you installed phpMyAdmin onto your server, it automatically created a database user called phpmyadmin which performs certain underlying processes for the program. Rather than logging in as this user with the administrative password you set during installation, it’s recommended that you log in as either your root MySQL user or as a user dedicated to managing databases through the phpMyAdmin interface.
Configuring Password Access for the MySQL Root Account
In Ubuntu systems running MySQL 5.7 (and later versions), the root MySQL user is set to authenticate using the auth_socket plugin by default rather than with a password. This allows for some greater security and usability in many cases, but it can also complicate things when you need to allow an external program — like phpMyAdmin — to access the user.
In order to log in to phpMyAdmin as your root MySQL user, you will need to switch its authentication method from auth_socket to one that makes use of a password, if you haven’t already done so. To do this, open up the MySQL prompt from your terminal:
Next, check which authentication method each of your MySQL user accounts use with the following command:
+------------------+------------------------------------------------------------------------+-----------------------+-----------+
| user             | authentication_string                                                  | plugin                | host      |
+------------------+------------------------------------------------------------------------+-----------------------+-----------+
| debian-sys-maint | $A$005$I:jOry?]Sy<|qhQRj3fBRQ43i4UJxrpm.IaT6lOHkgveJjmeIjJrRe6         | caching_sha2_password | localhost |
| mysql.infoschema | $A$005$THISISACOMBINATIONOFINVALIDSALTANDPASSWORDTHATMUSTNEVERBRBEUSED | caching_sha2_password | localhost |
| mysql.session    | $A$005$THISISACOMBINATIONOFINVALIDSALTANDPASSWORDTHATMUSTNEVERBRBEUSED | caching_sha2_password | localhost |
| mysql.sys        | $A$005$THISISACOMBINATIONOFINVALIDSALTANDPASSWORDTHATMUSTNEVERBRBEUSED | caching_sha2_password | localhost |
| phpmyadmin       | $A$005$?#{Z?`gN!c2az)}V-INCWXSuVdqB9zWteH1IkZfTe/rOLgVhSzEMM9R3G6K9    | caching_sha2_password | localhost |
| root             |                                                                        | auth_socket           | localhost |
+------------------+------------------------------------------------------------------------+-----------------------+-----------+
6 rows in set (0.00 sec)
This example output indicates that the root user does in fact authenticate using the auth_socket plugin. To configure the root account to authenticate with a password, run the following ALTER USER command. Be sure to change password to a strong password of your choosing:
Note: The previous ALTER USER statement sets the root MySQL user to authenticate with the caching_sha2_password plugin. Per the official MySQL documentation, caching_sha2_password is MySQL’s preferred authentication plugin, as it provides more secure password encryption than the older, but still widely used, mysql_native_password.
However, some versions of PHP don’t work reliably with caching_sha2_password. PHP has reported that this issue was fixed as of PHP 7.4, but if you encounter an error when trying to log in to phpMyAdmin later on, you may want to set root to authenticate with mysql_native_password instead:
Then, check the authentication methods employed by each of your users again to confirm that root no longer authenticates using the auth_socket plugin:
+------------------+------------------------------------------------------------------------+-----------------------+-----------+
| user             | authentication_string                                                  | plugin                | host      |
+------------------+------------------------------------------------------------------------+-----------------------+-----------+
| debian-sys-maint | $A$005$I:jOry?]Sy<|qhQRj3fBRQ43i4UJxrpm.IaT6lOHkgveJjmeIjJrRe6         | caching_sha2_password | localhost |
| mysql.infoschema | $A$005$THISISACOMBINATIONOFINVALIDSALTANDPASSWORDTHATMUSTNEVERBRBEUSED | caching_sha2_password | localhost |
| mysql.session    | $A$005$THISISACOMBINATIONOFINVALIDSALTANDPASSWORDTHATMUSTNEVERBRBEUSED | caching_sha2_password | localhost |
| mysql.sys        | $A$005$THISISACOMBINATIONOFINVALIDSALTANDPASSWORDTHATMUSTNEVERBRBEUSED | caching_sha2_password | localhost |
| phpmyadmin       | $A$005$?#{Z?`gN!c2az)}V-INCWXSuVdqB9zWteH1IkZfTe/rOLgVhSzEMM9R3G6K9    | caching_sha2_password | localhost |
| root             | $A$005$3y�y|Z?'_[} ZyVHuESVwNmjKWOH/ndETwS.Kty0IH7UfiXjOfVvyWroy4a.   | caching_sha2_password | localhost |
+------------------+------------------------------------------------------------------------+-----------------------+-----------+
6 rows in set (0.00 sec)
This output shows that the root user will authenticate using a password. You can now log in to the phpMyAdmin interface as your root user with the password you’ve set for it here.
Configuring Password Access for a Dedicated MySQL User
Alternatively, some may find that it better suits their workflow to connect to phpMyAdmin with a dedicated user. To do this, open up the MySQL shell once again:
If you have password authentication enabled for your root user, as described in the previous section, you will need to run the following command and enter your password when prompted in order to connect:
From there, create a new user and give it a strong password:
Note: Again, depending on what version of PHP you have installed, you may want to set your new user to authenticate with mysql_native_password instead of caching_sha2_password:
Then, grant your new user appropriate privileges. For example, you could grant the user privileges to all tables within the database, as well as the power to add, change, and remove user privileges, with this command:
Following that, exit the MySQL shell:
You can now access the web interface by visiting your server’s domain name or public IP address followed by /phpmyadmin:
https://your_domain_or_IP/phpmyadmin
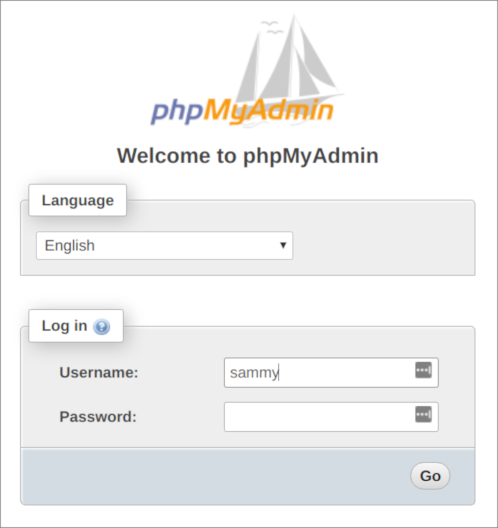
Log in to the interface, either as root or with the new username and password you just configured.
When you log in, you’ll be taken to phpMyAdmin’s user interface:
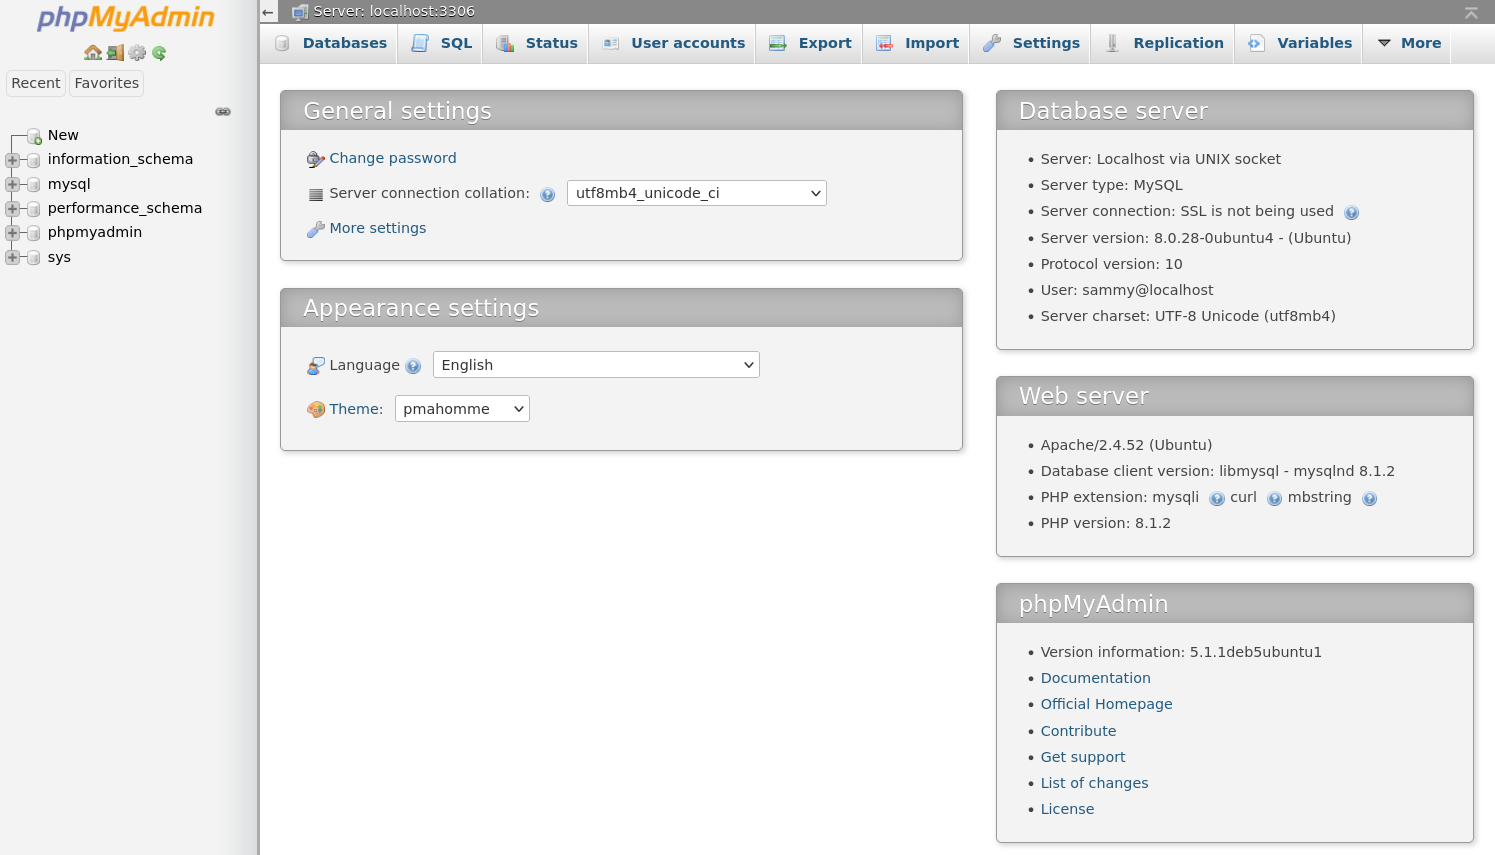
Now that you’re able to connect and interact with phpMyAdmin, all that’s left to do is harden your system’s security to protect it from attackers.
Step 3 — Securing Your phpMyAdmin Instance
Because of its ubiquity, phpMyAdmin is a popular target for attackers, and you should take extra care to prevent unauthorized access. One way of doing this is to place a gateway in front of the entire application by using Apache’s built-in .htaccess authentication and authorization functionalities.
To do this, you must first enable the use of .htaccess file overrides by editing your phpMyAdmin installation’s Apache configuration file.
Use your preferred text editor to edit the phpmyadmin.conf file that has been placed in your Apache configuration directory. Here, we’ll use nano:
Add an AllowOverride All directive within the <Directory /usr/share/phpmyadmin> section of the configuration file, like this:
<Directory /usr/share/phpmyadmin>
    Options SymLinksIfOwnerMatch
    DirectoryIndex index.php
    AllowOverride All
    . . .
When you have added this line, save and close the file. If you used nano to edit the file, do so by pressing CTRL + X, Y, and then ENTER.
To implement the changes you made, restart Apache:
Now that you have enabled the use of .htaccess files for your application, you need to create one to actually implement some security.
In order for this to be successful, the file must be created within the application directory. You can create the necessary file and open it in your text editor with root privileges by typing:
Within this file, enter the following information:
AuthType Basic
AuthName "Restricted Files"
AuthUserFile /etc/phpmyadmin/.htpasswd
Require valid-user
Here is what each of these lines mean:
AuthType Basic: This line specifies the authentication type that you are implementing. This type will implement password authentication using a password file.AuthName: This sets the message for the authentication dialog box. You should keep this generic so that unauthorized users won’t gain any information about what is being protected.AuthUserFile: This sets the location of the password file that will be used for authentication. This should be outside of the directories that are being served. We will create this file shortly.Require valid-user: This specifies that only authenticated users should be given access to this resource. This is what actually stops unauthorized users from entering.
When you are finished, save and close the file.
The location that you selected for your password file was /etc/phpmyadmin/.htpasswd. You can now create this file and pass it an initial user with the htpasswd utility:
You will be prompted to select and confirm a password for the user you are creating. Afterwards, the file is created with the hashed password that you entered.
If you want to enter an additional user, you need to do so without the -c flag, like this:
Then restart Apache to put .htaccess authentication into effect:
Now, when you access your phpMyAdmin subdirectory, you will be prompted for the additional account name and password that you just configured:
https://domain_name_or_IP/phpmyadmin

After entering the Apache authentication, you’ll be taken to the regular phpMyAdmin authentication page to enter your MySQL credentials. By adding an extra set of non-MySQL credentials, you’re providing your database with an additional layer of security. This is desirable, since phpMyAdmin has been vulnerable to security threats in the past.
